Token-based authorization with Sitecore Services Client
So Sitecore 8.2 has been released and us developers have a new set of toys to play with. A feature that’s recently caught my eye is the introduction of token based authorization for the Sitecore Services Client API. This post walks you through how to set this up and start working with token based authorization.
Sitecore.Services.Client
If you’re not familiar with Sitecore Services Client I suggest a bit of reading is in order but this is the formal definition of what it is:
“a service layer on both the server and the client side of Sitecore applications that you can use to develop data-driven applications. Sitecore.Services.Client is configurable and extendable, and the framework and the “scaffolding” it gives you help you create the client-server communication in an application in a consistent way. Sitecore.Services.Client uses the ASP.NET Web API as a foundation”
In a nutshell it provides a Web API layer for your Sitecore content that provides CRUD operations and if you ever need to have content available externally from Sitecore you should use this API.
You can find out more about the API here - Developers Guide
ItemService
With the release of Sitecore 8.2 the under lying architecture has had a bit of a refactor and now the code for API layer sits under the namespace - Sitecore.Services.Infrastructure The API still consists of 2 mains parts the ItemService and the EntityService. In this post I’ll be focussing on the ItemService.
The ItemService provides a single HTTP endpoint an API to interact with Sitecore items over HTTP. Sitecore.Services.Client ships with routes predefined to interact with the ItemService, and you do not need to do any server-side development to use the ItemService.
Typically you can make requests via a simple request like so:
https://mysitecoreinstance/sitecore/API/ssc/item/{5045E8FB-965A-45E0-BEE1-A8E88F7ED1A0}
and the API returns json:
"ItemID":"5045e8fb-965a-45e0-bee1-a8e88f7ed1a0","ItemName":"About","ItemPath":"/sitecore/content/Home/About","ParentID":"110d559f-dea5-42ea-9c1c-8a5df7e70ef9","TemplateID":"76036f5e-cbce-46d1-af0a-4143f9b557aa","TemplateName":"Sample Item","CloneSource":null,"ItemLanguage":"en","ItemVersion":"1","DisplayName":"About","HasChildren":"False","ItemIcon":"/temp/iconcache/applications/16x16/document.png","ItemMedialUrl":"/~/icon/Applications/48x48/document.png.aspx","ItemUrl":"~/link.aspx?_id=5045E8FB965A45E0BEE1A8E88F7ED1A0&_z=z","Text":"","Title":"About"}
This is all well and good but if we have remote clients using this service then we’d need to secure the API calls appropriately.
Prior to Sitecore 8.2 if you needed to secure the requests this would only be possible via cookies.
This mechanism may be fine for other remote websites, but for other system this may present a problem. Token-based authorization simplifies the process and the authorization can be stateless and falls in line with API best practice.
JWT Tokens
Sitecore’s implmentation of token based authorization uses the Jwt Web tokens API.
JSON Web Tokens are an open, industry standard RFC 7519 method for representing claims securely between two parties. More info here - https://jwt.io/
This library does all the creating validating of tokens but also allows you to implement your own Signing Credentials and Validation parameters.
Enabling Token-based authorization
To enable token based authorization there’s a few config changes you need to make.
First go to the Sitecore.Services.Client.config file in /app_config/inlcude
Enable the token authorization by changing this setting to true.
<setting name="Sitecore.Services.Token.Authorization.Enabled" value="true" />
Next, you need to configure the Signing Provider.
Still in Sitecore.Services.Client.config, find the
<tokenSecurity>
  <signingProvider type="Sitecore.Services.Infrastructure.Sitecore.Security.SymetricKeySigningProvider, Sitecore.Services.Infrastructure.Sitecore">
           <param desc="connectionStringName">Sitecore.Services.Token.SecurityKey</param>
   </signingProvider>
</tokenSecurity>
Or better still add a patch file to add the settings like so:
   <configuration>
       <sitecore>
          <api>
	       <tokenSecurity>
                <signingProvider type="sitecore.services.infrastructure.sitecore.security.symetrickeysigningprovider, sitecore.services.infrastructure.sitecore">
                  <param desc="connectionstringname">sitecore.services.token.securitykey</param>
                </signingProvider>
           </tokenSecurity>
          <api>
       </sitecore>
     </configuration>
Then you need to add a new connection string in your ConnectionStrings.config file and specify a secret key.
Please don’t use this one below. Note you have to have “key=” in there in order for it to work.
<add name="Sitecore.Services.Token.SecurityKey" connectionString="key=GHUwnYMxb75Td25yqyVdQQ8QQ8RzBG6T" />
Testing it out
Now you should all be set to start using authorization. However in order to test it we have to set up some security restrictions.
By default the security is set up with the policy - Sitecore.Services.Infrastructure.Web.Http.Security.ServicesLocalOnlyPolicy
This means that if you are calling the API locally then you will always will have access and there will be no security checks. So to test out the authorization I enabled this setting:
<setting name="Sitecore.Services.AllowAnonymousUser" value="true" />
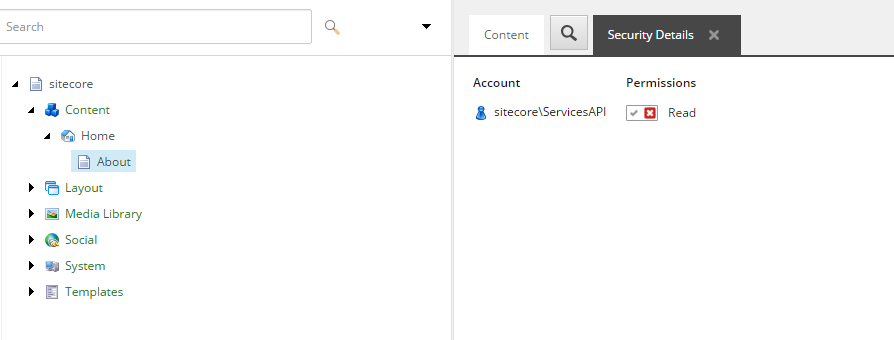
With this enabled all requests will take place within the following Sitecore user account:
sitecore\ServicesAPI
I then denied this user account access to a page. You’ll see how this is relevant shortly.
Fire up Postman
My tool of choice for testing APIs is Postman. it has a really nice interface and is dead simple to use. Postman
First I’ll perform a test call to the ItemService API to prove that I have restricted access in the API.
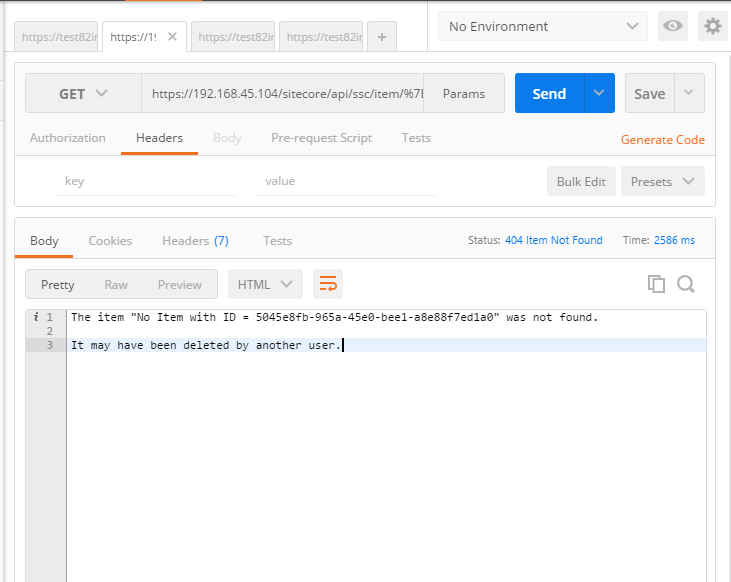
The request comes back with a 404 as this is off limits to the SericesAPI user.
Lets perform some authorization:
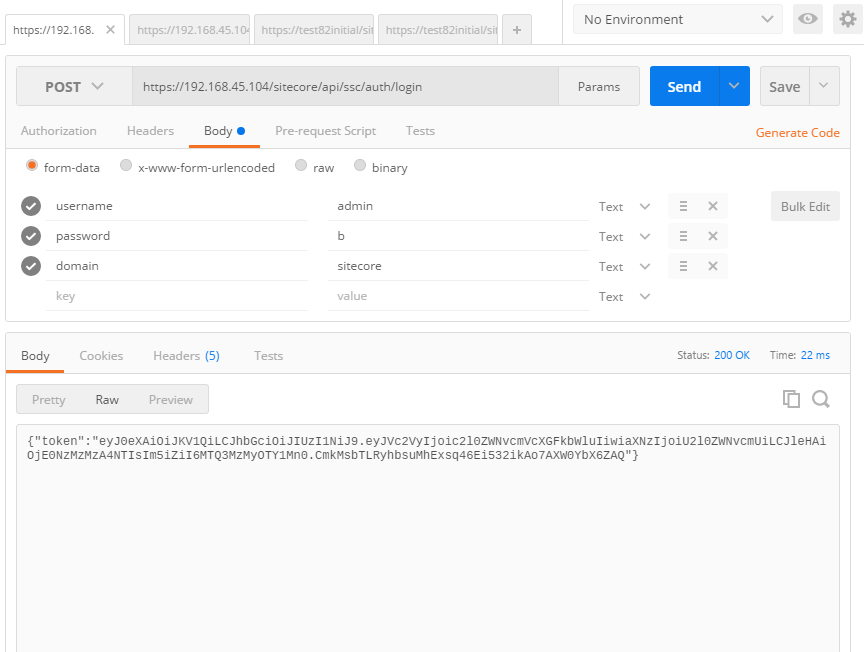
Note, we need to add the username, domain and password to the body of the POST. Also this needs to go over https other wise it wont work!
The API now returns a token rather than setting a cookie.
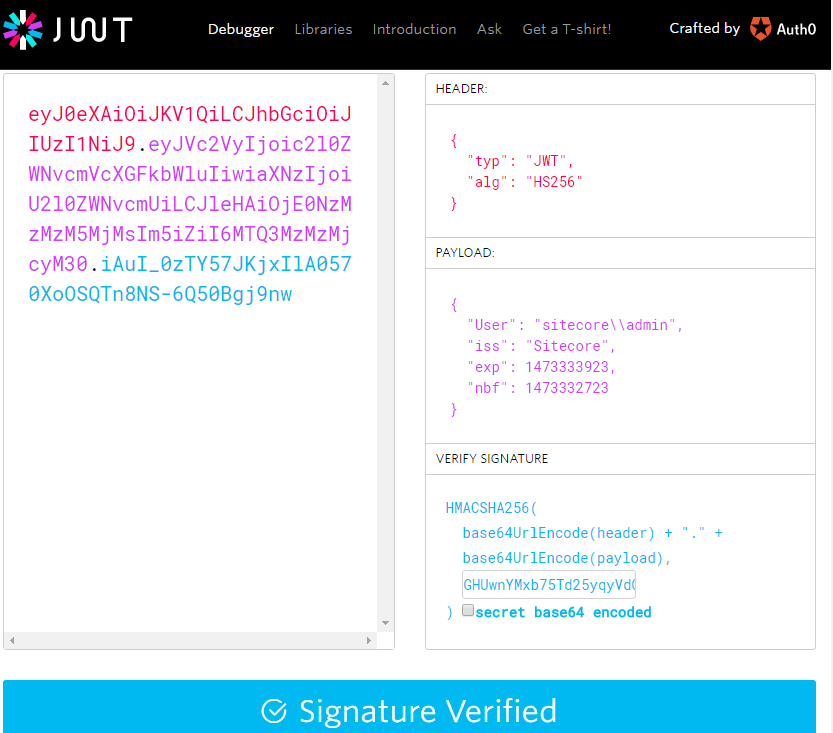
So lets take a look at this token. We can actually use the JWT debug tool to verify the token.
If we add this token to the header of the call we did previously:
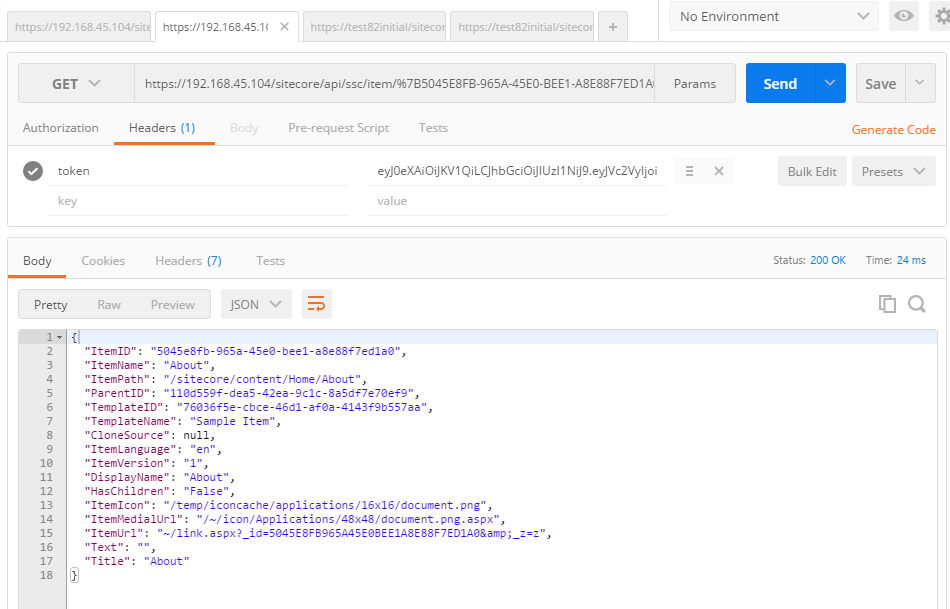
The call performs the request under the user account we specified in the authorization request and we can get JSON!!
As you can see this is a great addition to the Sitecore.Services.Client API and makes securing requests much easier.